Monday, August 20, 2012

It's in the air...

Do you smell that?

 simple img 2 oak leaf wallpaper marijuana leaf pictures maple leafs wallpaper leaf wallpaper border autumn desktop wallpaper

Can you smell that fall is on its way? I can!! This time of year I feel like a little kid waiting for that first leaf to fall or see the first pumpkin on the front doorsteps of a neighborhood house. Autumn is my favorite season. Nothing compares to the smell of apples and cinnamon and the feeling of the crisp air in the evening.

I have big plans for this season. Over the last 10 years, I have moved around a lot and never really gotten into the fall spirit like I wanted. We were living out of boxes and never quite had that feeling of home. Almost exactly a year ago, we moved into this house. I decorated the porch last year with pumpkin and corn, but still didn't go all out like I wanted. This year is a whole other story. This year I can finally say that I am as settled as I have been in my adult life and I am going to go all out!

All these ideas of things I wanted to do to celebrate the fall season have been in my head the last few days. I figured I should write these amazing ideas down so I won't forget!

Things to do before December (in no particular order):
  • Take a drive through the mountains when the leaves are changing.
  • Visit a pumpkin farm.
  • Decorate the front porch.
  • Make apple EVERYTHING!  I'm talking pies, butter, sauce, bread, and anything else I can put an apple in.
  • Make corn chowder and brunswick stew.
  • Have a family pumpkin carving night.
  • Make a new fall wreath.
  • Take a hayride.
  • Go through a corn maze.
  • Start making homemade Christmas presents.
  • Make at least one of the kids Halloween costumes.
  • Learn to use a pressure canner.
  • Get good pictures of the kids.
  • Go to a fall festival 


Anything else I should add?


Tuesday, August 14, 2012

Feeling a little corny...

Growing up I remember a day each summer that my grandparents and another family got together and had a long day putting up corn. Usually around the hottest day of July, they would find some farmer along side of the road and make a deal with him. The farmer would usually want to get home to his family so he would give them a hard to pass up deal on a pick up truck full of ears.

I never fully understood the logistics of putting up that many ears of corn since I was pretty young. I just remember the adults doing all the work and the kids playing baseball or running through the sprinkler. And of course there was the occasional game of Super Mario Bros.  At the end of the day, we would all go home tired but filled our freezer with the best corn ever.

Now in adulthood and dabbling in the art of food preservation, I decide that I want to put up corn this year. After just a little convincing, I talked Cory into getting 100 ears from a local Mennonite farm. It cost us $30.00. I talked to my grandmother about the best method. Husk. Blanche. Cut. Bag. We could do this no problem. I had been practicing a little with like a dozen leftover ears from the farmer's market. It took me about 6 ears cut off to fill one bag. I packed them somewhat full. I wanted enough for the four of us for dinner with some leftover for our work lunches. So I did my math... 6 ears to a bag, 100 ears of corn, we should end up with 16 bags of corn. (Remember this number)

Cory picked up 4 of these large bags full of corn. I had the whole ordeal planned out in my head. We would husk outside but boil and bag inside. I would fill up the sinks with ice and it would all be smooth sailing. Well apparently Cory had another plan. He wanted to use the turkey fryer outside and set up a cutting station on the tailgate of his truck. We went with his plan, and I can admit it was the right way to go.
I had asked my grandfather if he wanted to come over and help husk. He must have been really bored so he actually agreed! He husked most of the corn for us while I did the cutting and Cory worked the fryer. It was really nice when we had the opportunity to all sit down together and husk because Grandpa was telling us stories about himself that I had never heard before. I found out he used to be a firefighter when he was a teenager!
Cory was in charge of the cooking process. He would boil the husked ears for four minutes then put in the ice water. It was such a good idea to use the turkey fryer. I bought him that a couple years ago at Christmas and we have only used it once for last Thanksgiving. I couldn't even imagine how messy and hot my kitchen would have been if we would have cooked it inside.
I set up the back of the truck with my little makeshift kitchen. Cooled corn would go on the cookie sheets and I would cut in one of my oblong pots. I got a great tip from Pinterest (I wish I could give the credit to whoever thought of this but I don't know who it was!). If you stand up the corn on a smaller bowl in the pot, you are able to go straight to the bottom of the ear without hitting the bottom of your pot. This made it much easier for me. After I would fill up this pot, I would dump the cut corn into another pot with a lid. At that point, it would be bagged in gallon size freezer bags.

So I'm cutting, and cutting, and still cutting... I looked at how many ears we had already down and how many we had to go. We figured out pretty quickly that there were way more than 100! There were at least 140 ears. We finished everything up in about five hours. As I am putting the bags into the freezer, I was counting. We ended up with 46 bags of corn!!! I was a little off with my initial guess of 16! The freezer was full!

Overall it was a really good day and a bonding experience between the three of us. I am all about making memories lately and I definitely think this will be a new one. I also think this will be a new tradition for us each summer!

Monday, May 14, 2012

A Moment on Mother's Day...

Something happened today.

I have never been one for plants. I grew up with my grandmother, who religiously went to nurseries and to garden departments in the home improvement stores. I hated these trips. I hated spending hours walking up and down rows of plants, that to me, served no other purpose than to look pretty. As I grew up and out on my own, she would give me a little plant here and there for my apartment. They would die shortly thereafter. I didn't have the time to invest in this houseplant that once again, served no purpose.

In starting this homesteading journey, I knew I would have to face the gardening aspect. The theory in my head is that I would be planting vegetables. They produced something I could eat, therefore making any efforts worthwhile. I have been slowly finding myself enjoying sprouting my seeds on my kitchen window sill and spending a couple hours outside planting in my corner garden. Things have been going well.

So this brings us to today. We have recently moved into my boyfriend's house. It was by far a bachelor pad. I decided today to take on the front flower beds to help give the house some curb appeal. They are currently empty except for a few random tulip bulbs and bottle caps leftover from nights of drinking on the front porch during the bachelor days. Taking on this task meant that I was facing something I knew I was completely clueless about and if history repeats itself, anything I plant will probably die anyway. So I packed up the kids and drove out to Lowe's. They were interested for about 10 minutes and then ended up in the cart whining about wanting to go home and how it was boring. It was muggy and about an hour past their nap times. We walked up and down the garden department looking for inexpensive plants that would be colorful.

When we got home, I got the kids down for a nap and I went outside and started digging. Not sure of proper placement and spacing and watering requirements, I started guessing at where things should go. It took me awhile, but I got things looking pretty nice. I felt like I was redeeming myself for all the plants I had killed before. I only had one more plant to get into the ground...

Then it happened. I placed the plant into the hole and I was packing the dirt around it and I felt this overwhelming feeling of connectedness. I doubt that is a word, but I felt something so powerful in my heart. It was a pure feeling of goodness. It was as if there was an energy that I was sharing with this plant and the dirt and just nature in general. It was like I could feel how alive it was. I felt like I was doing the right thing by taking this plant out of that black plastic container and returning it to its home in the earth.  I'm sure the majority of people that would read this would think I am now a crazy plant lady, but I know there has to be people that have this connection.

This moment I feel has changed me. I feel like this was something I needed. As I have stated in other posts, I have times of self-doubt and insecurity. I think to myself, why am I trying to do all this? But there are moments like this that are hard to describe, that give me complete reassurance in the path I am taking. It was a brief feeling, but it will stay with me forever...

Monday, April 23, 2012

Tide's Got Nothing On Me...

I mentioned in one of my first ever posts that I make my own laundry detergent now. I swear by it and will NEVER buy detergent from the store again. It cleans just as well as store bought, there are no added perfumes and dyes, and the cost savings really add up! Also a benefit for my family, my detergent is great for sensitive skin.

I would like to share my recipe for my powdered laundry soap. This not an exact science. If you search for "homemade detergent" you will get many many recipes with basically the same ingredients in varying amounts. I encourage you to play around with the amounts to find what works for you. Also, powdered vs. liquid is completely a personal preference. I have always used liquid detergent, but I find the powder works just as well and seems like it is faster to make and easier to store. So basically, whatever floats your boat :)


So the Dream Team of ingredients for homemade laundry detergent are Washing Soda, Borax, and bar soap. I use Fels Naptha for my soap. Some people use Ivory or other mild soap. Fels Naptha is about a $1.00 a bar. This was the most commonly used in the recipes I found so I stuck with it. The fourth ingredient I use is a generic "Oxy-Clean" type product. All of these can be found at your local grocery store.

First thing you will need to do is grate your bar soap. I got an inexpensive grater at the dollar store. I use the very fine shred so that my soap is small enough that it will mix and dissolve well. My first grating experience was awful. It took forever and made my arm hurt. Now I take my soap, grater and bowl, and sit in front of the television. It gets done pretty fast.  Also, let me warn you. If you leave a bowl of grated Fels Naptha in your kitchen, there is a possibility that your children or significant other will try to eat it since it looks like cheese. Don't ask how I know this, and don't worry, they recovered...

So for my batch, I used the following amounts:
  • 3 bars of grated soap
  • 3 cups Washing Soda
  • 3 cups Borax
  • 1 cup or so generic Oxy

Now I am sure if you go on Pinterest, you can find a really cute, crafty container to keep your detergent in. Here is my pretty bucket...


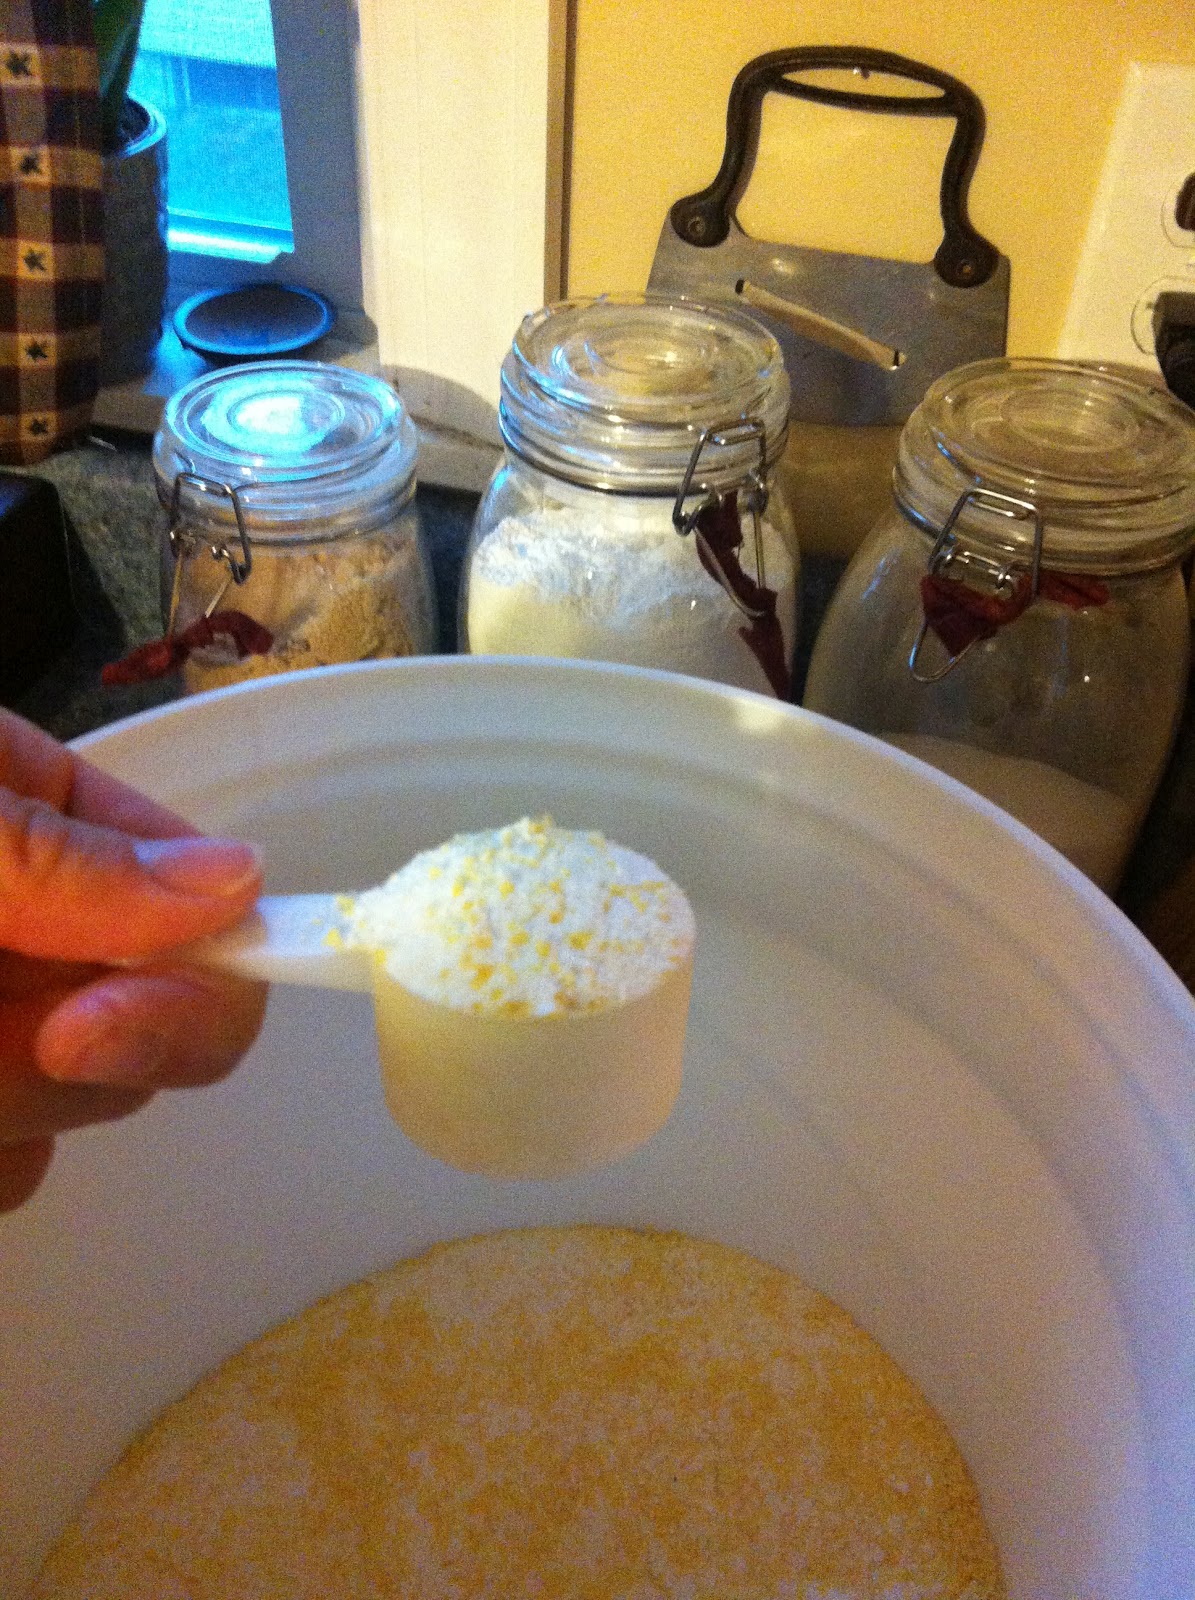
 Mix all of your ingredients together. Try not to breathe in the dust.  It should look something like this:


 I use the scooper out of the generic Oxy to measure my detergent. You could also use a coffee scoop, a tablespoon, maybe one of the cap measuring cups from cough syrup or other medicine. Basically, you will use one tablespoon per load. If your clothes are really dirty, you may want to add a little more. 


This is now the point where if you want it to be scented, you could add some essential oils. I prefer for it to be unscented.

Making your own detergent is a great starting point in homesteading and living frugally. Just be warned... It is like the "gateway soap," once you make laundry detergent, you will want to make hand soap, dish washing soap, dishwasher soap, and so on...

Laundry Is A Four Letter Word, Not Really, But It Should Be...

The term "laundry day" is completely ridiculous in our house. If I could get all my laundry done for the week in one day, I would be the happiest lady around. I'm not sure what I hate about it the most.

Washing isn't too bad. Our laundry area is our unfinished basement. Not as creepy as some basements, but it is far from the glamorous designs you find online.You know, the ones with the twenty drawers and matching bins all labeled perfectly. And whose laundry room really has crown molding?

Then there is the folding. This is probably the part I don't mind. Its like that instant gratification when you turn a heaping laundry basket of warm clothes (okay who am I kidding? Our clothes frequently sit a day or so unfolded until I can get around to them) into neat piles of clothing organized by family member and type of apparel.

So I lied a little bit earlier, after writing about this, I definitely know what I hate the most. Putting the clothes away! It's horrible. I'm sure for some of you that may have large walk in closets and spacious dressers, this isn't really that big of a deal for you. We however are lacking in the storage department. Our "master bedroom" does not have a closet. So all our clothes go in the dresser or draped over furniture or piled in laundry baskets. The kids have so many clothes, I cannot even get everything in the dressers. They at least have closets, but I have hijacked my son's closet to hang dresses and coats. I don't think there is a room in the house that does not have at least one laundry basket in it.

I have been trying to find some solutions to our organizational dilemmas. I have read about "family closets." This is a very interesting concept that will not work at all for us in our current house. A family closet is a room, preferably with the washer and dryer, where everyone in the family would keep all their clothes. All your laundry supplies are there, when you fold things you don't have to leave the room to put it away. There are tons of blogs and articles (Lots of KidsMusings from the Heart, and True Moments of Family to name a couple) that are talking about this. Also apparently I just found out in my Googling, that the Duggar family (I know you know who this is) works from a family closet.

I normally try to store off season clothes in plastic tubs or under bed storage. This year the winter was incredibly mild, so I packed all the heaviest clothes and coats away. But of course, the weather is almost freezing today and there was a threat of snow (it's almost May!?!?!). Needless to say, my kids had to wear lightweight jackets with layers of shirts and sweatshirts underneath to stay warm.

Are we the only family out there with this problem? I guess the best answer to this would be to downsize the amount of clothes we have and find creative organizational solutions. Anyone have any good suggestions? What works in your home?

Sunday, April 1, 2012

Today I ate a baby...

I ate a Dutch Baby, that is. If you have never tried one of these perfect desserts disguised as breakfast, you are missing out my friends. This morning I woke up and remembered seeing a picture of this big fluffy pancake on Pinterest and I just had to make it. After about 30 minutes of trying to find the pin, I gave up and just started googling. I ended up with a recipe for this German pancake. I love German food and I can't believe I have never had one of these before.


If heaven could be on a plate, this is what it would look like. And of course since I love you all, I will share the recipe.

Ingredients:
6 eggs
1 cup milk, room temp
1 cup flour
1/4 tsp cinnamon
1/4 tsp vanilla extract
5 Tbsp butter

I preheated the oven to 450 degrees. I put my cast iron skillet in the oven to  get all nice and scalding hot. I beat the eggs until they were frothy and smooth then added everything else except for the butter. Then you have to beat it for about 5 minutes.  When your cast iron is hot, take it out of the oven and add the butter. Let the butter melt and coat the pan. Add your batter and then stick it back in the oven for 20 minutes.

After 20 minutes, you will open the oven door and see this:

 The kids thought is was pretty cool.  I brought it out and slid it onto a big plate. I added some sugared strawberries, confectioner's sugar and whipped cream. You would be able to top it with anything. I think next time I will bake it with apples. I love recipes that are so basic that you can change little things to have a completely taste.

Happy baking!

Sunday, March 4, 2012

The Bread for the Butter...

So lately my friends have been really into the home-party businesses whether it be hosting one or becoming a consultant. I went to a food party (I won't mention the name but I am sure a couple people can figure it out) and they had the most delicious beer bread mix. I bought a box that included three mixes for about 15 bucks. I made it when my order came in and it was just as delicious as I remembered. As I was eating it though, I thought that there has to be a recipe out there that is similar to this and that would cost a fraction of the price. With the help of advice from friends, I got a generic beer bread recipe off of one of the big recipe sites. But then I thought, what could I do to make this better?? So here is what I came up with:


The generic recipe calls for:
  • 3 cups self rising flour
  • 3 Tbsp white sugar
  • 12 oz can or bottle of beer 
Here are my additions:
  • 1 cup shredded cheese ( I used a three cheese blend but any kind would work)
  • 3 Tbsp melted butter
  • 1/2 tsp seasoning blend of salt, pepper, garlic powder (Here is what I make)

I mixed together the flour, sugar, and added the beer (after I took a sip). It started to get hard to stir so I just used my hands to mix it. In a separate bowl, I added just a little (about a Tbsp) of flour to the cheese, and coated it. This will help the cheese from going to the bottom (or so I was told). When your dough is well mixed, place it in a greased 9x5 loaf pan. I used one I took from my grandmother's house. I have really nice new ones but there is just something about baking bread in the same pan that she used when I grew up. Anyhoo, place the dough in that and spread it out evenly. Make sure you get it all down in the corners. Mix the melted butter and the seasoning in a separate bowl. Pour this over top the bread dough.
I then cooked the bread for 50 minutes in a 350 degree oven. After the fifty minutes of my house smelling amazing, my creation was done! As soon as it came out I used a knife to loosed the sides, took it out and put it on a rack to cool. It didn't stay on the rack long though because there is nothing more delicious than bread right out of the oven.  The middle is very soft and the outside had a crustiness that is great. The seasoning on the top is very light, but it definitely adds to the flavor.

Happy baking!!